


You probably wonder if you can install diy ppf on your car and get great results. With the right tools and a clear process, you can create lasting protection that keeps your car looking sharp. Preparation and patience matter most. Take your time and follow each step for a finish that stands out.
DIY PPF: Is It Right for You?
What to Expect from DIY Paint Protection Film
You may ask if putting on paint protection film yourself is a good plan. It has self-healing, UV resistance, and a hydrophobic coating. These things help your car stay shiny and safe for a long time.
If you want to try diy ppf, you should know what to expect. You can save money and work when you want. You control the job and learn new things. But you need to be patient and careful. Cleaning the car well is very important. Try small spots like mirrors or headlights first before doing the whole car.
Pros and Cons of DIY PPF
Here are some things to think about before you start:
- Skill and practice are important. If you have not used vinyl or film before, you may need more practice.
- DIY saves money and lets you choose your own time.
- You might see bubbles or edges come up if you hurry or skip steps.
- Professionals often do better work, but it costs more.
- Advantages:
- Good for people who want to save money.
- You pick when and how to do the job.
- Disadvantages:
- You might make mistakes if you are new.
- It may not last as long as a pro job.
If you want to save money and protect your car, diy can be a smart idea. Go slow, follow the steps, and you can keep your car safe for a long time.
How to Install Paint Protection Film
Ready to protect your car with diy ppf? You can follow this step-by-step guide to install auto paint protection film and get lasting protection. Let’s break down each step so you can achieve a professional finish.
Gather Tools and Materials
You need the right tools for a smooth installation. Many brands offer complete kits, so you don’t have to hunt for each item. Ravoony has a master kit that includes everything you need for paint protection film installation. You can find kits on its website. These kits make it simple to start your diy project.
Here’s what you should have:
- Paint protection film (Ravoony Pro is a great choice)
- Squeegee (felt-edged works best)
- Spray bottles
- Utility knife with sharp blades
- Heat gun
- Microfiber towels
- Slip solution (filtered water and baby shampoo)
- Gloves
Clean and Prep the Surface
You want your car’s surface to be spotless. Dirt or dust can cause bubbles and ruin the finish. Wash your car with soap and water. Dry it with microfiber towels. Check for any leftover debris. Clean again if needed. The cleaner your surface, the better the protection.
Mix and Apply Installation Solution
The slip solution helps you move the film into place. Mix filtered water and baby shampoo. For gloss finishes, use 32 ounces of filtered water with 1.5-2ml of baby shampoo. If it’s hot outside, add a bit more soap. Always use distilled water to avoid minerals. Keep the water around 75°F for best results. Make the solution fresh each day for strong adhesion.
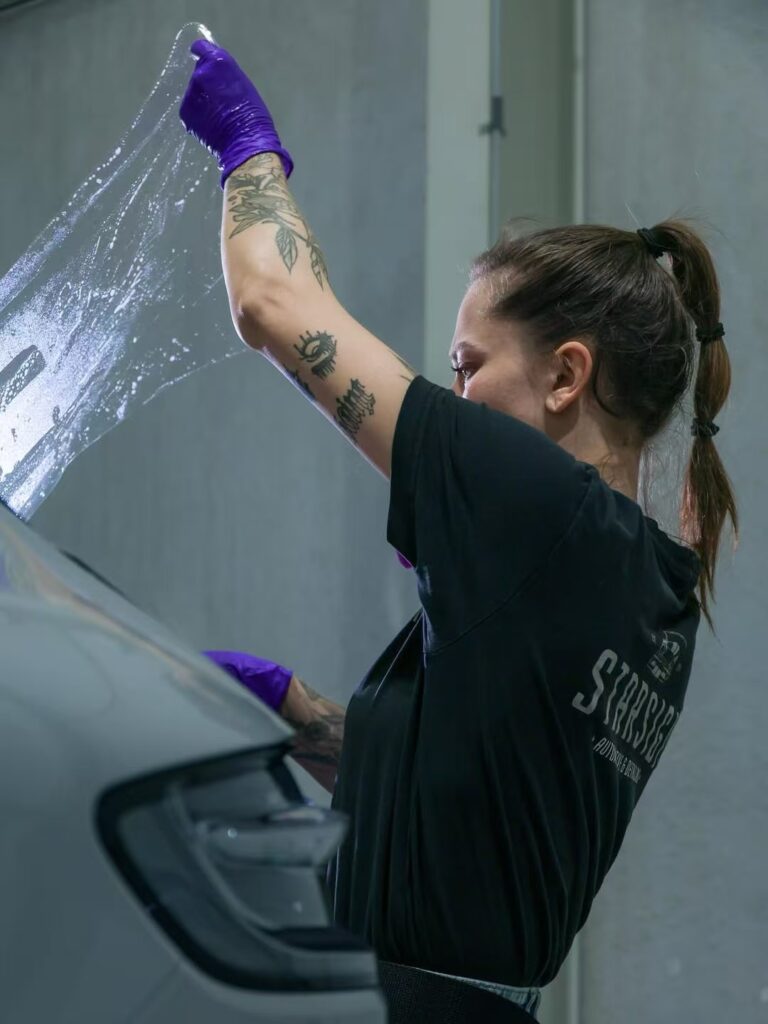
Align and Tack the Film
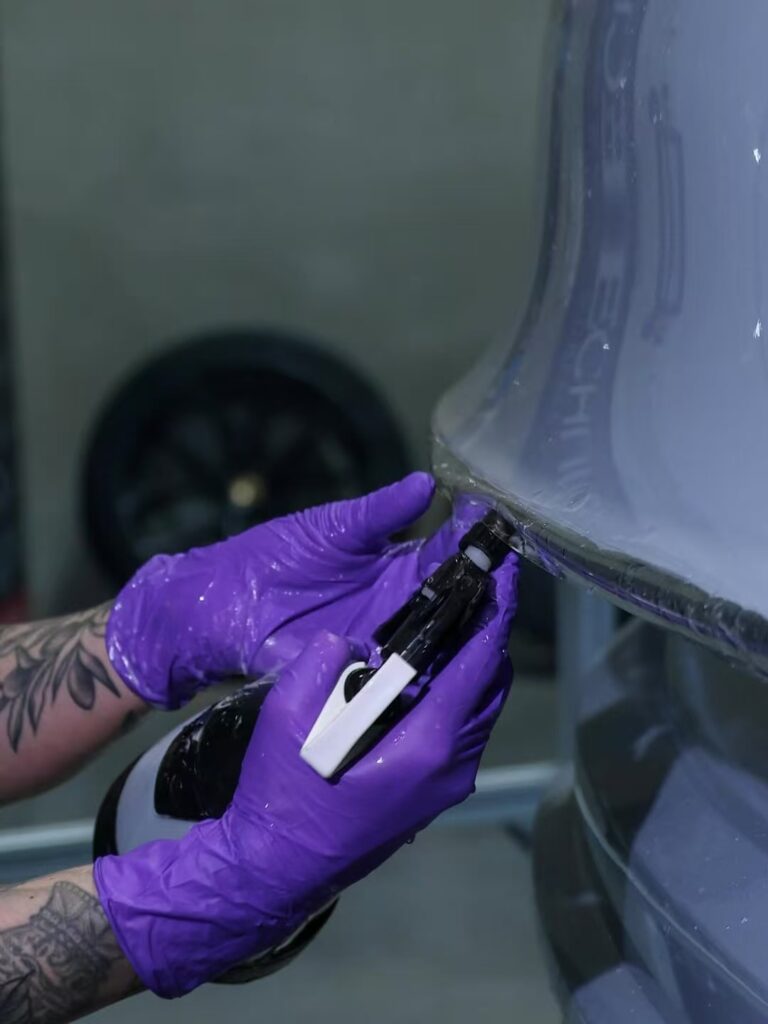
Spray the slip solution on the panel and the film. Place the film gently on the surface. Align it with the edges and curves. Start tacking down corners to hold the film in place. Make sure the film sits flat and covers the area you want to protect.
Squeegee and Remove Bubbles
Use a felt-edged squeegee. Start from the center and push bubbles out toward the edges. Work slowly. Don’t rush. If you see stubborn bubbles, spray more solution and try again. Keep the squeegee clean to avoid scratches. This step helps the film bond and gives you a clear, smooth finish.
Trim and Wrap Edges
Now you need to trim and wrap the edges for a seamless look. Use a sharp utility knife for clean cuts. Wrap the film around panel edges using the full folding technique. This hides seams and creates a continuous surface. Use a heat gun to soften the film and help it conform to curves. Apply controlled heat along edges to activate the adhesive. Smooth the edges with your squeegee. Re-inspect and apply heat again if needed.
| Step | Action | Result |
|---|---|---|
| Trim excess film | Use sharp blade along panel edges | Clean lines |
| Wrap edges | Fold film around edges | Sealed perimeter |
| Apply heat | Use heat gun along edges | Permanent bond |
Note: Wrapping edges well keeps dirt and moisture out, boosting protection.
Let the Film Set
You must let the paint protection film set before using or washing your car. Initial bonding takes 24 to 48 hours. Full curing can take up to two weeks. Keep your car in a cool, dry place. Ideal temperature is between 60°F and 80°F. Humidity should stay between 40% and 70%. The quality of your installation and the type of film affect curing time.
You can follow this step-by-step guide to install paint protection film and enjoy lasting protection. Take your time, use the right tools, and pay attention to each step. Ravoony Pro’s features make the process easier and help you achieve a professional finish.
Aftercare for Lasting Protection
Cleaning and Maintenance Tips
You want your auto paint protection film to look great and last as long as possible. Regular care makes a big difference. Here are some easy cleaning and maintenance tips:
- Wash your car by hand every two weeks. This keeps the film clear and extends its life by up to 80%.
- Use a pH-neutral automotive shampoo. Harsh soaps can damage the protection.
- Try the two-bucket hand wash method. One bucket holds clean water, the other holds soapy water. This helps prevent scratches on the film.
- Remove bugs, tar, or bird droppings quickly. Use a bug and tar remover on a microfiber towel.
- Always act fast when you see contaminants. Quick cleaning keeps your protection strong.
Spotting and Fixing Issues
Sometimes you might notice problems with your diy ppf. Don’t worry. You can fix most issues if you spot them early. Check out this table for common problems and solutions:
| Common Issue | Description | Recommended Solution |
|---|---|---|
| Overstretched Film | Thin spots, visible texture changes | Use minimal stretching and proper patterns |
| Poor Edge Sealing | Dirt and moisture lift the film | Wrap or seal edges well |
| Bubbles and Contamination | Air or dirt trapped under the film | Work in a clean space, use correct application techniques |
| Misalignment | Film doesn’t match body lines | Take time to align before sticking |
| Adhesive Contamination | Weak bonding due to dirty adhesive | Keep surfaces clean, follow proper protocols |
| Improper Curing Time | Film fails if rushed | Allow enough time for curing |
Maximizing Longevity
You want your protection to last for years. Follow these steps to get the most out of your paint protection film:
- Use non-abrasive cleaning products. These keep the film safe.
- Avoid harsh chemicals and pressure washing.
- Park your car in shaded or covered spots. This reduces UV damage and keeps your protection looking new.
- Inspect your film regularly. Fix small issues right away.
- Clean spills with mild soap and water. Quick action prevents damage.
You can also use a car cover to shield your paint protection film from dust and debris. Regular care and quick fixes help your protection last longer and keep your car looking sharp.
Mistakes to Avoid & When to Seek Help
Common DIY PPF Errors
You might feel excited to install paint protection film yourself, but mistakes can happen. Knowing what to watch out for helps you get a better result. Here are some frequent errors people make:
- Inadequate surface preparation. If you skip cleaning, the film won’t stick well.
- Misalignment. Not lining up the film can leave edges exposed.
- Contamination. Dust or oils can sneak under the film if your workspace isn’t clean.
- Excessive stretching. Pulling the film too much can cause thin spots.
- Improper heat application. Using too much or too little heat can damage the film.
- Rushing the curing process. If you don’t let the film set, it won’t protect your car properly.
- Insufficient use of slip solution. Not using enough solution makes it hard to move the film.
- Failure to remove bubbles or wrinkles. Bubbles and wrinkles can ruin the look and let dirt in.
You can avoid these mistakes by taking your time, following each step, and working in the right conditions. Cool, dry days are best for diy ppf.
Signs You Need a Pro
Sometimes you run into problems that need expert help. Here are signs you should call a professional:
- Bubbles or air pockets keep coming back after you try to fix them.
- Discoloration or yellowing shows up on the film.
- Cracks or tears appear, making the film less protective.
- Edges start peeling or corners lift up.
- Deep scratches build up and won’t heal.
Complex vehicle designs with curves and tricky edges often need a pro to install paint protection film. If you see persistent bubbles, lifting edges, or surface imperfections, a professional can seal and smooth the film for lasting protection. Experts use special tools and know how to handle tough spots.
Note: If you notice any of these issues, don’t wait. Getting help early keeps your car safe and looking great.
You can protect your car’s paint with DIY PPF if you follow each step and stay patient. Make sure you clean the surface, align the film, and seal the edges well. After you finish, wash your car by hand and check for any issues. If you feel unsure or see problems, a professional can help you get the best results.